MicroPython + Thonny 環境利用の基礎知識
ファームウェアの ESP32 マイコンへの書き込み
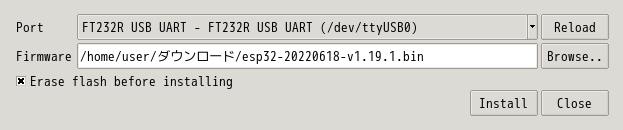
ESP32 マイコンの教育ボードを PC に接続する. デバイス名は /dev/ttyUSB0 とする.
MicroPython のファームウェアの書き込み
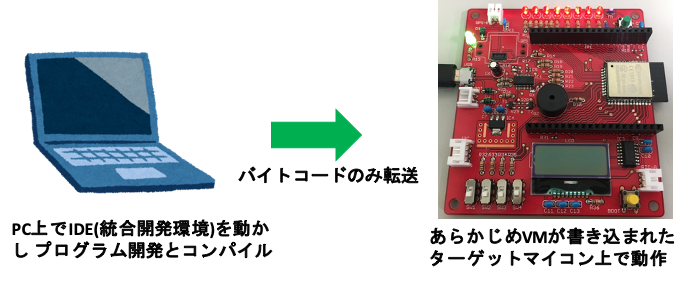
MicroPython でプログラミングする場合は, 以下の図のような処理の流れになる. このような処理を行う上での大前提は, あらかじめマイコン上に 仮想マシン (VM) をインストールすることである.
実習用 Linux のダウンロードフォルダには, <URL:https://micropython.org> の「Download」より取得した MicroPython のファームウェア (esp32-20220618-v1.19.1.bin) が置かれている. これをマイコンに予めインストールする必要がある.
MicroPython の開発環境として Thonny を利用する. 「アプリケーション」=> 「開発」=> 「Thonny」から, Thonny を起動する.
Thonny の「ツール」メニューから、「Options」を選択して、「インタプリタ」タブを選択する。 まずは以下の設定を行う。
- インタプリタ: MicroPython (ESP32)
- Port : <Try to detect port automatically>

次に、「Firmware」のすぐ下のボタンを押して、マイコンにファームウェアを書き込む
MicroPython のリファレンス
<URL:http://docs.micropython.org/en/latest/esp32/quickref.html>
<URL:https://micropython-docs-ja.readthedocs.io/ja/latest/esp32/quickref.html>
初めの一歩: Hello World
hello world を表示するプログラムを入力する.
while True:
   print('Hello World')
   time.sleep(1)
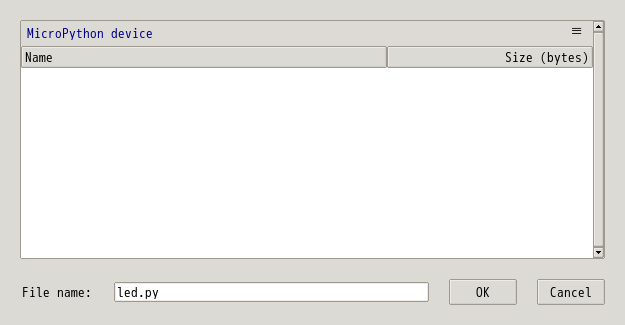
次に、「再生ボタン (Run current script (F5))」をクリックする。 ウィンドウ(Where to save to?) が開くので, 「Micropython device」を選択する。 保存するファイル名は適当で良い。